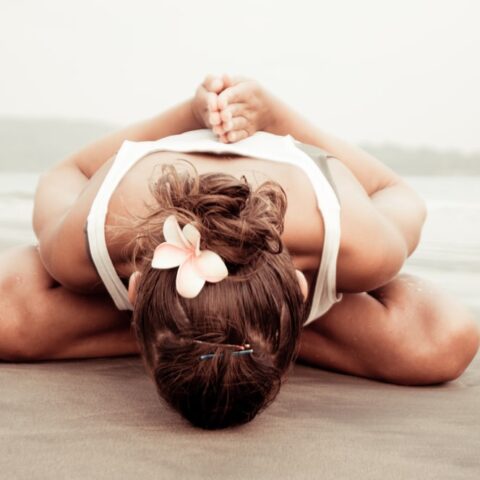
Practicing yoga asanas or poses provides many health benefits, from toning your muscles and building strength to increasing relaxation and relieving stress.
One of the most sought-after benefits of yoga though is increased flexibility, so what is the best type of yoga for flexibility?
The Best Type of Yoga for Flexibility
In truth, there isn’t a “best type of yoga for flexibility”, although we recommend Hatha, Vinyasa, Hot Yoga, and Vin Yoga to improve flexibility.
Plus, to get a better understanding of why and how yoga aids in improving flexibility, let’s take a closer look at some of the most common types of yoga taught in studios and the science of flexibility.
What Are the Most Common Types of Yoga?
The popularity of yoga in the West has been increasing steadily for decades.
Yoga is a practice that extends beyond holding physical poses but for many students, a physical practice in a studio is their first introduction.
Below are some examples of the most common types of yoga practiced at a yoga studio.
Though by the yoga lineage and terminology, Hatha refers to any practice of physical poses, a Hatha class at a yoga studio is typically referring to a slow-paced class. These standard poses are held for 30 seconds to a minute allowing you to find proper alignment and build strength in the position. Source: BrettLarkinYoga
Poses are typically held for less than 30 seconds as you move in connection with your inhalations and exhalations. Source: Yoga with Kassandra
Bikram yoga consists of a consistent sequence of 26 poses. In Bikram and other styles of hot yoga, poses are held for 20 seconds to one minute, depending on the pace of the class and the pose. Source: OneTreeYogaOmaha
Poses are held for longer periods of time, typically two minutes or longer, so you feel a deeper stretch in the connective tissues. This passive practice aims to address stiffness in your tissues. Source: Boho Beautiful
How Does Yoga Help Improve Flexibility?
Despite the differences between these styles, the asanas or poses practiced remain rather constant across styles.
These poses encourage stretching and strengthening of muscles through alignment and repeated use. Our muscles are organs which function to enable movement through coordinated contraction and lengthening.
Even though muscle extension has an active role in skeletal movement, there is little scientific research to directly connect increases in muscle fiber elasticity to increased flexibility. In fact, after stretching, the elasticity of the muscle returns to normal.
You can see this in your yoga practice.
Attempt to move as deep into a pose an hour after a hot yoga class.
Do you see the same results?
After the class has ended and you have cooled down your muscles’ normal elasticity returns. Though you may have easily slid into the full expression an hour ago you may be unable to now.
The elasticity you gained through warming up and slowly elongating your muscles is gone.
For transient flexibility measures, hot yoga and yin yoga are great practices to see your current range of motion. In hot yoga, the heat helps muscles warm up faster so you can quickly ease into deeper expressions.
On the other end of the spectrum, yin yoga and other practices that hold poses for extended periods give your body time to slowly open up. By staying in a pose longer you find a deeper stretch as your body relaxes into the posture.
How Do You Achieve Long-Term Flexibility and Balance?
Our muscles are controlled by the central nervous system which consists of our brain and spinal cord. Muscle spindles act as sensors that detect changes in muscle length.
These changes are communicated to the nervous system via afferent nerve fibers. This communication triggers the myotatic reflex and the muscle begins to resist the stretch by contracting.
With sustained stretching, the spindles’ rate of firing slows down. As the spindles adapt to the force they allow the muscles to relax.
Current research theorizes that stretching aids in flexibility by helping our brains adapt to the sensations stretching brings.
As you stretch longer a greater change in muscle length is required to trigger the muscle spindles.
Because the acceptable range of motion is increasing you can stretch deeper without sending signals to your brain that the act is unsafe or painful.
Flexibility is gained gradually as the new norm and sensation of stretching is slowly accepted.
How Long Should You Hold Yoga Poses?
The length of time to hold a pose is dependent on the style of yoga being practiced as mentioned above. If you’re seeking to see improved flexibility it is best to hold poses for an extended period.
In faster-paced classes such as vinyasa, you still get benefits of increased flexibility but as you move through the poses with more speed you and your connective tissues don’t have as much time to respond.
When holding poses longer, as in a yin yoga class, the steady load applied to the muscle fibers invites the connective tissues to stretch.
Are There Benefits of Holding Yoga Poses a Long Time
Though the length of time a pose is held depends on the style of yoga practiced, holding poses for longer periods of time does introduce certain benefits.
Extending time holding a pose encourages your muscles and joints to settle into the posture and find the correct alignment. The additional time helps develop muscle memory of how the pose should feel.
This may help you reach proper alignment more immediately when practicing faster-paced flows like vinyasa. As you stay in a pose longer, the added load improves stamina and builds extra strength.
Finding ease in a pose held for longer periods also encourages a more meditative yoga practice and connection with your body.
How Should You Stretch in Yoga for Flexibility?
As warm muscles are more pliable, you will get the most out of your practice or stretches if you properly warm up first. Many yoga sequences are intentionally crafted to warm up target areas building to a deeper expression.
Pairing Marjariasana, cat pose, with Bitilasana, cow pose, is a common warm-up sequence to warm up the torso and spine in preparation for other backbends such as Chakrasana or Urdva Dhanurasana, upward bow.
Warming up muscles makes them less likely to reflexively contract and helps alert the brain to the expected range of motion. As you begin to stretch, move slowly and intentionally. All movements should be free of pain.
When first warming up, perform dynamic stretching. The movement in this stretching introduces heat and motion to the muscles, encouraging them to lengthen.
Does Yoga Hurt?
If first starting a yoga practice you may discover new sensations and muscles you didn’t know you had but you shouldn’t feel pain. After your first few sessions of intentional yoga asana practice, you will likely feel sore.
Holding poses that your body is unfamiliar with will also work to strengthen muscles that are rarely used leading to more awareness in your body.
As you practice find the maximum expression where you are able to find ease and always remember to breathe. Listen to your body and back away if you begin to feel pain.
What Are the Best Yoga Poses for Splits?
When working towards Hanumanasana (monkey pose) or full splits practice poses that target the muscles involved, primarily the hip flexors and hamstrings.
Of the group of muscles known as the hip flexors, the psoas major is the strongest.
The psoas is often considered together with the iliacus as the iliopsoas. The iliopsoas can be stretched by practicing Anjaneyasana (low lunge), Eka Pada Rajakapotasana (one-legged king pigeon pose), or Utthan Pristhasana (lizard pose).
The other main muscle group to stretch for the splits is the hamstrings. The hamstrings are responsible for extending the leg at the hip and flexing the knee.
To stretch the hamstrings practice Parsvottanasana (intense side stretch ) and Ardha Hanumanasana (half splits).
For all of these poses be sure to hold them for at least 30 seconds. You will see the most immediate benefits if practiced regularly so strive to practice multiple times a week or up to twice a day.
These each target one side at a time so remember to balance and stretch both sides.
What Is a Yoga Strap? Will a Yoga Strap Help Flexibility?
Amongst the props you may use in a yoga class is a yoga strap. These straps are typically 6 to 10 feet in length and come in a variety of widths, materials, and colors with either a metal or plastic buckle.
Despite the variations, these straps all effectively serve the same purpose – to aid in expressing poses. Whether a beginner or an advanced yogi, straps can be used to further deepen your practice.
When first starting out, a strap may help provide additional length as you work on flexibility.
Can’t touch your toes in Paschimottanasana, seated forward bend?
Place a strap against the balls of your feet and hold either end in each hand. This will help provide an anchor to fold deeper into the pose.
Progressing into binds, a yoga strap can also be used. A strap can make up for inflexibility in the hips and chest when binding in Utthita Parsvakonasana (extended side angle pose). Pulling on the strap will encourage these areas to open, eventually leading to full expression.
How Long Does It Take to Become More Flexible in Yoga? How Often Should I Practice?
It may not feel like it but you are already flexible! You may want to increase your range of motion but flexibility is necessary for movement.
If you want to increase the flexibility of a certain muscle group or region the time to see increased flexibility varies based on many factors.
The factors you have the most control over are the frequency of practice and time in the determined poses.
If you are serious about seeing visible changes in flexibility commit to practicing poses that lengthen the target area or muscle groups and commit to practicing them regularly.
As with any practice, you will see more immediate changes in your flexibility with a more consistent yoga practice. Practice yoga daily and hold the poses for at least 30 seconds.
If you can make time, hold them for longer. As your body grows increasingly accustomed to the stretches it will begin to release deeper into the positions.
The speed at which your flexibility increases depends on your own personal physiology and often times as we progress we may not see the gradual improvements made over time.
Photos or videos can be helpful tools to track progress as you continue on your stretching plan.
What Are the Benefits of Being More Flexible?
You may have your own personal flexibility goals like touching your toes or mastering the splits but the benefits of flexibility go beyond showing off to friends on Instagram.
Better flexibility can help your joints by allowing them to move through a more complete range of motion. This helps decrease the risk of injuries and tears.
Reaching your full range of motion also allows your muscles to move more effectively which can lead to improved performance in sports and other physical activities.
Though there may not be one style of yoga that is best for improving flexibility, you can use your yoga practice and poses as helpful entry points for deeper stretching.
As your body adjusts to regular practice and alignment in the poses it will begin to accept the sensation and let you move deeper into each stretch.
As with any practice, consistency is key; practice regularly to begin to see and feel the changes in your flexibility. You’ll be able to touch your toes or reach the split before you know it!
15-Minute Beginner Yoga Workout For Flexibility
Improving your overall flexibility has many benefits, including alleviating back pain and other health-related benefits.
We’ve designed a yoga workout for flexibility that can be done at home, and with practice, it will help beginners improve their flexibility.
It’s important to note that flexibility takes practice, and most people consider themselves reasonably stiff (or not flexible). Regularly practicing this yoga workout will greatly improve your flexibility over time.
This workout is great for increasing energy levels in the morning or unwinding your body after a tense day at work to loosen up your muscles.
Basically, you can practice yoga for flexibility anytime you want!
These yoga poses will often reduce back pain while (of course) improving your flexibility.
Who is this workout designed for?
- Someone who is entirely new to yoga.
- Someone who feels stiff and is looking to improve their flexibility.
- Someone who likes to practice yoga and burn fat.
During this workout, attempt to hold the poses for at least 30 seconds. Some poses shown below will need to be repeated on both sides for consistent results.
There are 12 poses in all, try going through the entire routine at least 3 times.
12 Yoga Poses That Increase Flexibility
1. Upward Facing Dog Pose
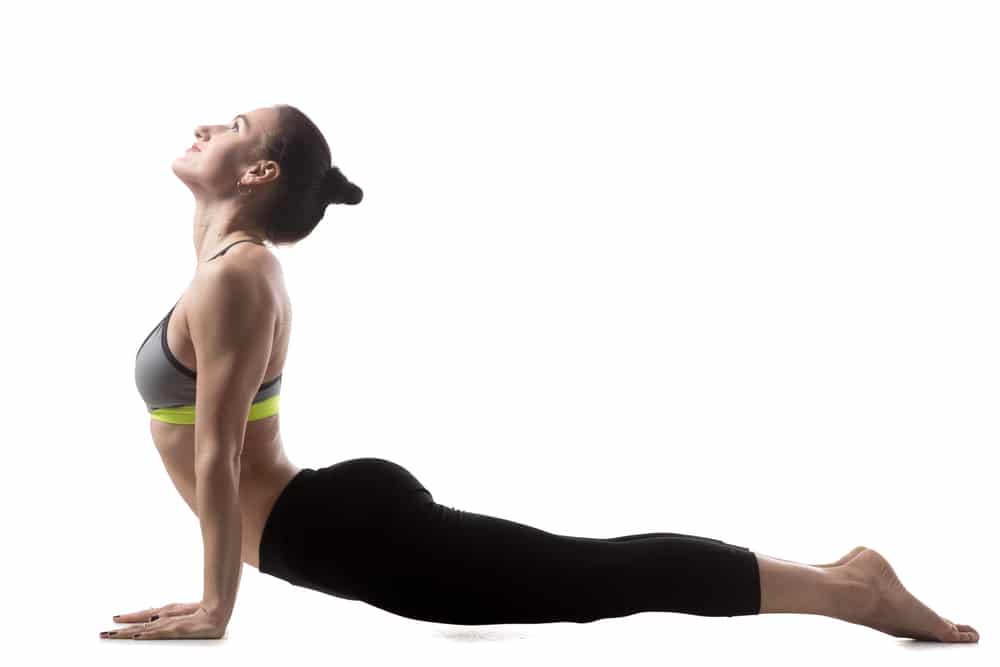 To start this pose, lie face down on the floor or face down on your yoga mat. Place your palms parallel to your hips.
Press up from the floor using your palms and the tops of your feet to lift your legs and hips up. Push your heart out and look straight ahead.
2. Downward facing dog Pose
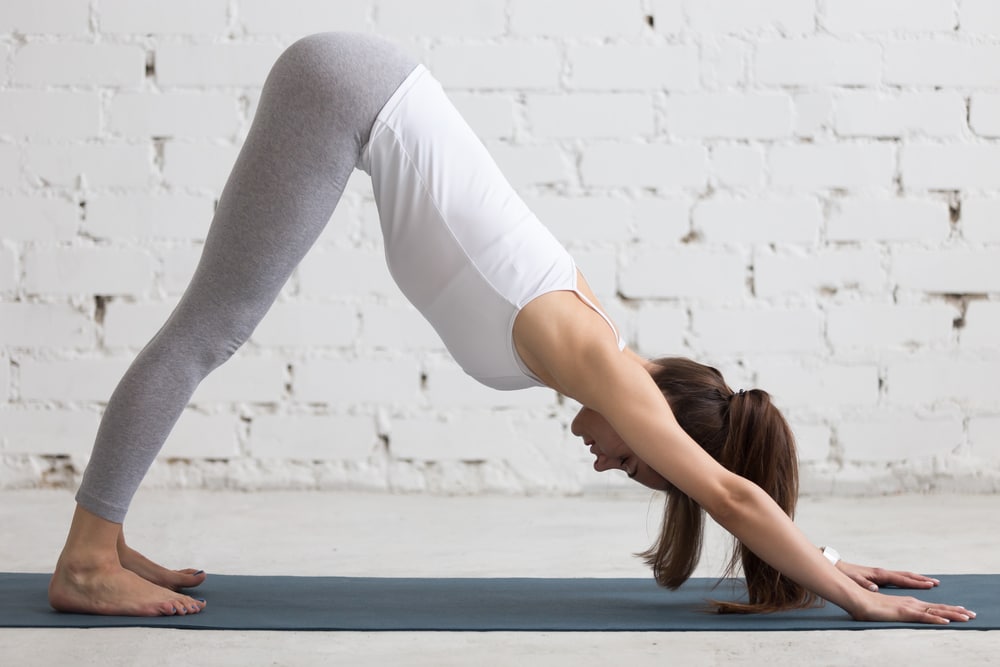 Start by placing your hands directly on the ground or on your yoga mat, and spread your fingers wide. Slowly extend your legs upward so that your butt is pointed towards the sky.
You should be making an upside-down V with this pose.
While in this pose, you want to make sure your lower back is straight and not arched, and your butt stays pointed outward.
This pose will stretch your hamstrings and shoulders.
3. Revolved Chair Pose Variation
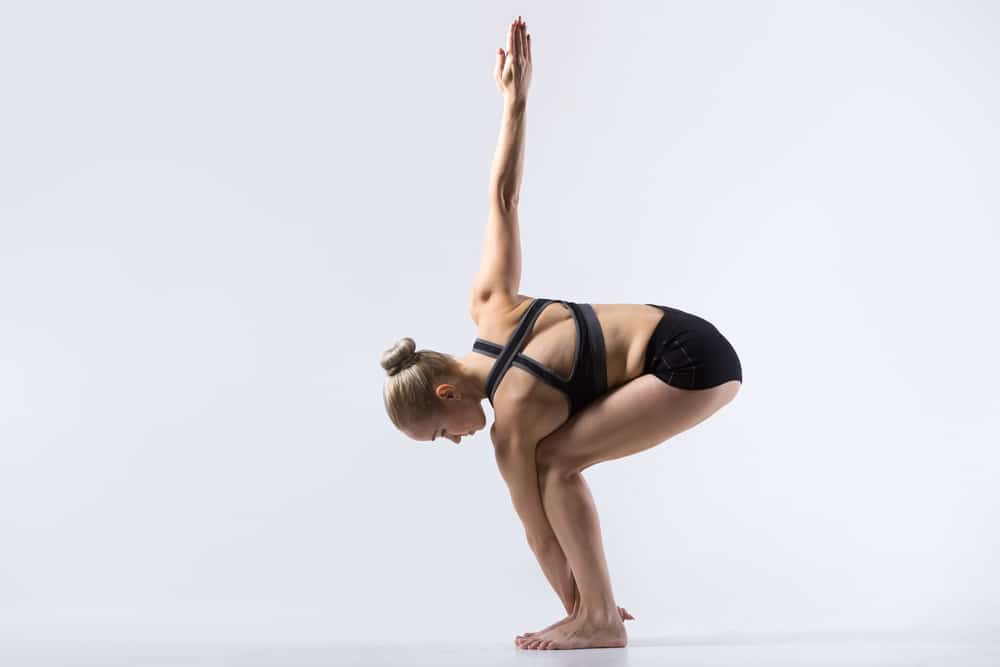 Begin standing up, then sit back slightly as if you are about to sit onto an imaginary chair. Your knees will be slightly bent, and your back will be slightly arched.
Extend your right arm down to the floor, touching the outside of your right foot. Your left arm will be extended towards the ceiling.
Move your head so that you are looking upward, and lean deeper into the twist to progress the stretch. This is a pose that will need to be practiced on both sides of the body.
4. Standing Half Forward Bend Pose
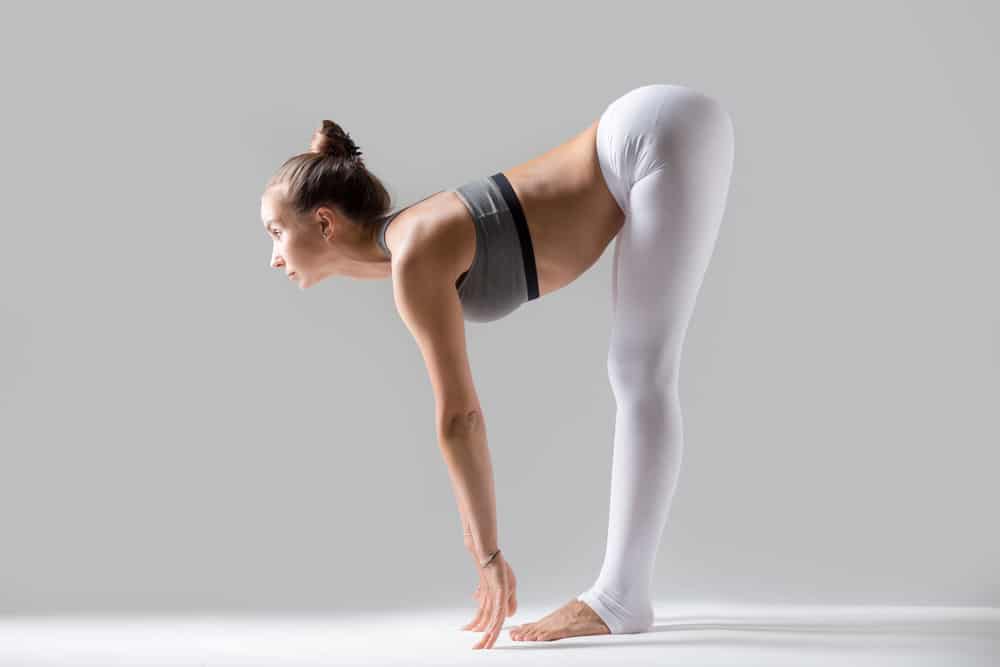 Start by standing tall with your feet firmly planted on the ground shoulder-width apart. Slowly bend forward, extending your arms to reach towards your feet.
It’s important to keep your back straight while practicing this pose which can present a challenge, as the back naturally tends to bend as your reach down. To counter this, arch your back and point your butt outward.
5. Camel Pose
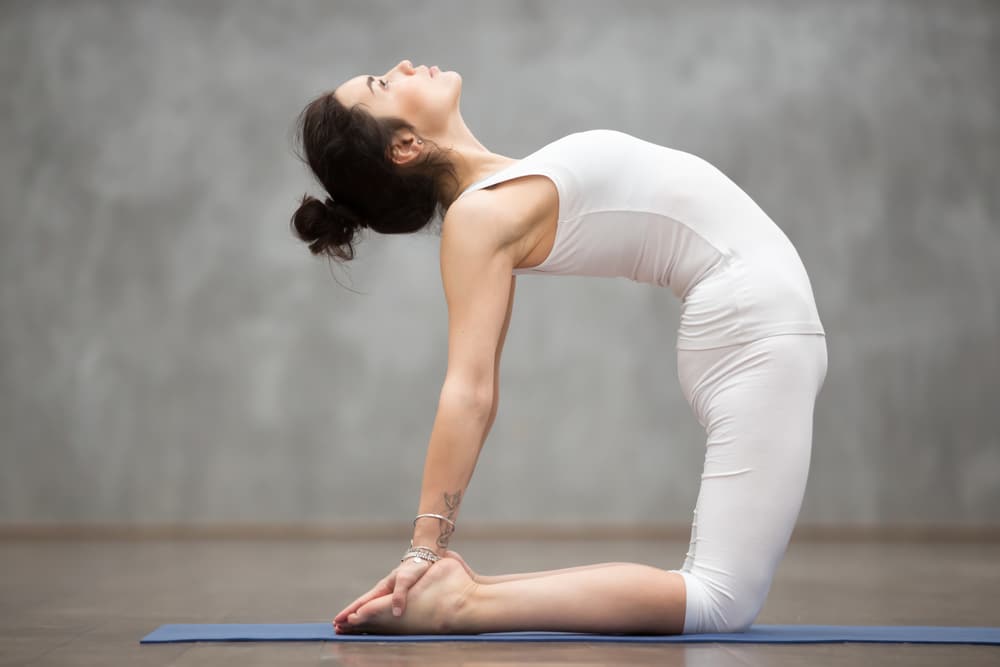 The benefit of this pose is the alleviation of back pain, and it will open up your chest and back.
To begin this pose, kneel on the floor or on your yoga mat allowing your arms to dangle on the side of your body. While kneeling, ensure that your knees are shoulder-width apart. Slowly reach your arms back to grasp your feet or ankles.
To deepen the stretch, arch your back more and lean into your pelvis.
This stretch can feel uncomfortable for beginners so you may not be able to hold it for a full 30 seconds. It’s okay, with practice you will get better.
6. Head to Knee Forward Bend Pose
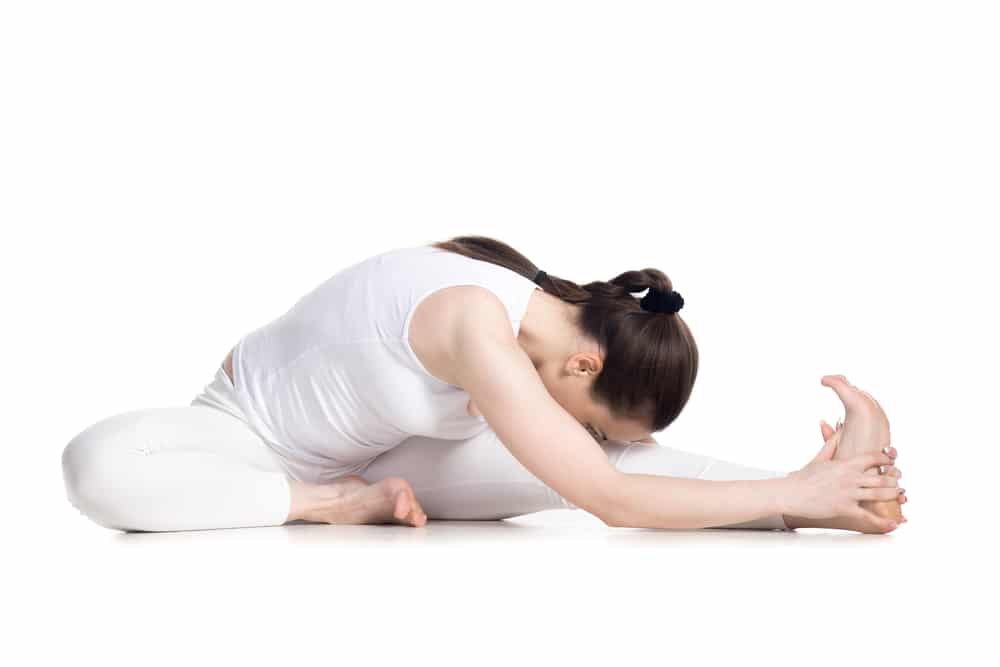 To start this pose, sit on the floor or yoga mat with your left leg extending outwards in front of you, and your right leg bent, resting against your left leg.
As you begin to exhale, reach your hands towards your left foot, as far as you can go. Deepen the stretch with each exhale to extend your arm as far as you can.
Do not attempt to stretch farther than you are capable as this will result in injury, instead focus on the sensations associated with your upper body extending.
Make sure to do this pose on both sides.
7. Extended Triangle Pose
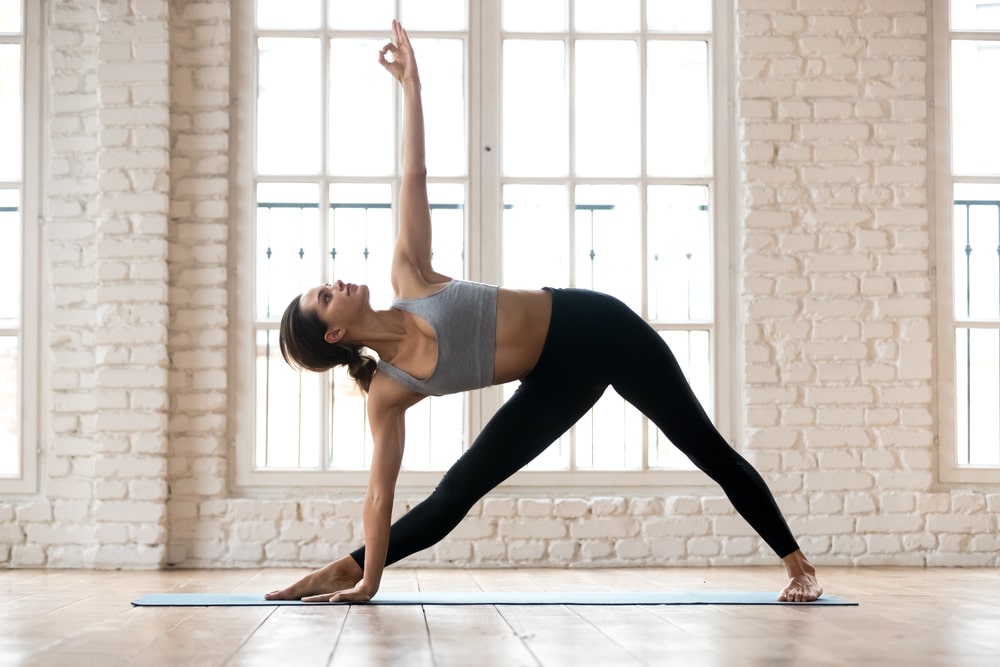 Begin this pose by standing up straight with your feet firmly planted on the ground. Slowly shift your right foot away from your left foot, so that there is about four feet in between your two feet.
Then, extend each arm out to the side, so that they run parallel to the ground. Rotate your feet so that your left toes are pointed forward, and your left toes are pointed out.
Then, as you exhale, pivot your body so that your right hand is reaching towards your ankle or the ground. Your left arm should move so that it is reaching for the ceiling.
Shift your eyes to the ceiling to look up.
As a beginner, you may not have the flexibility to reach the floor, you can contact whatever area of your leg you can to modify the pose.
8. Pigeon Pose
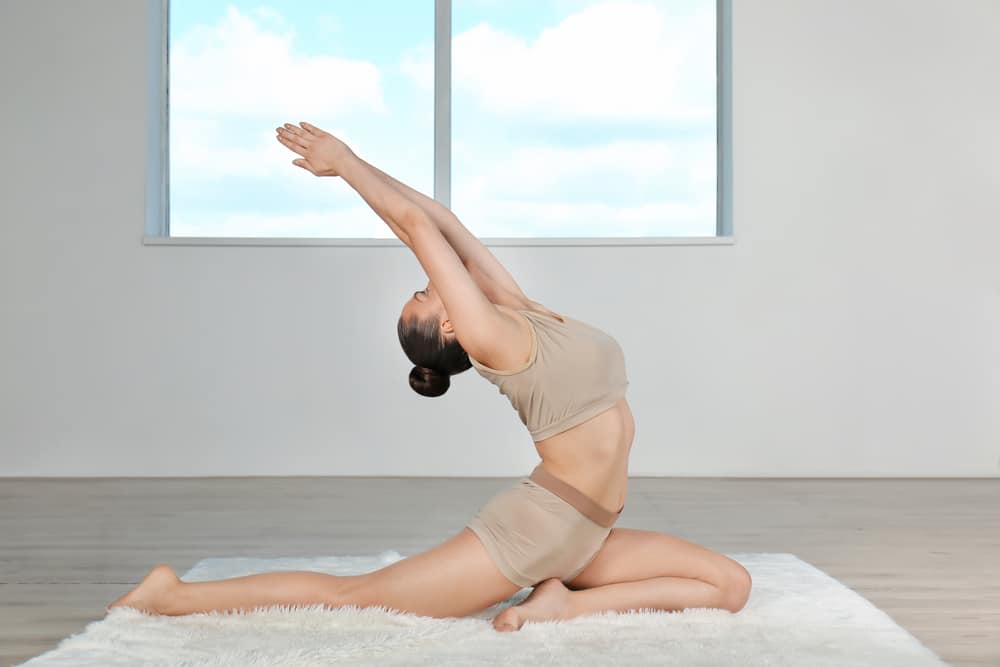 You will start this pose by kneeling on the floor or on your yoga mat. As you feel more comfortable, you will lift-up your right knee and place your right foot in front of your left knee.
For support, brace yourself with your hands while extending your left leg back behind you, making sure the top of your left foot is touching the ground.
As you stay in this pose, you will feel the stretch in your hip flexors. Perform this pose on both sides.
9. Standing Back Bend Pose
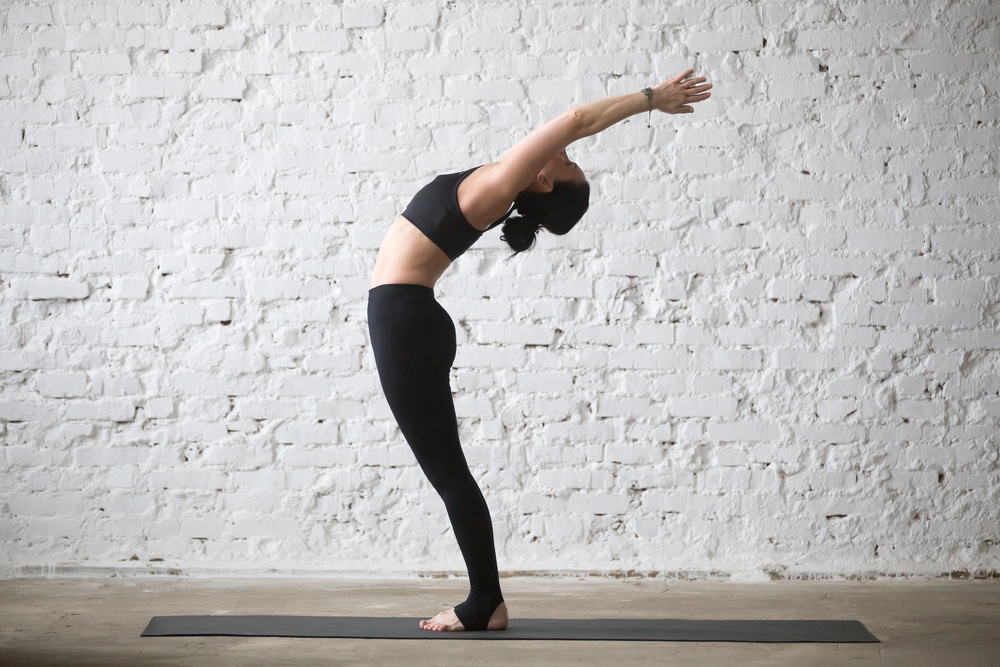 Begin by standing tall with your feet firmly grounded on the floor and your arms extended toward the ceiling.
Gently reach your arms further and further behind you to create a backbend and allow your back to arch. Do not reach back too far so that it causes discomfort, listen to your body as you lean back.
This pose can also cause some back strain for beginners, so hold the pose for less than 30 seconds if needed.
10. Warrior 1 Pose
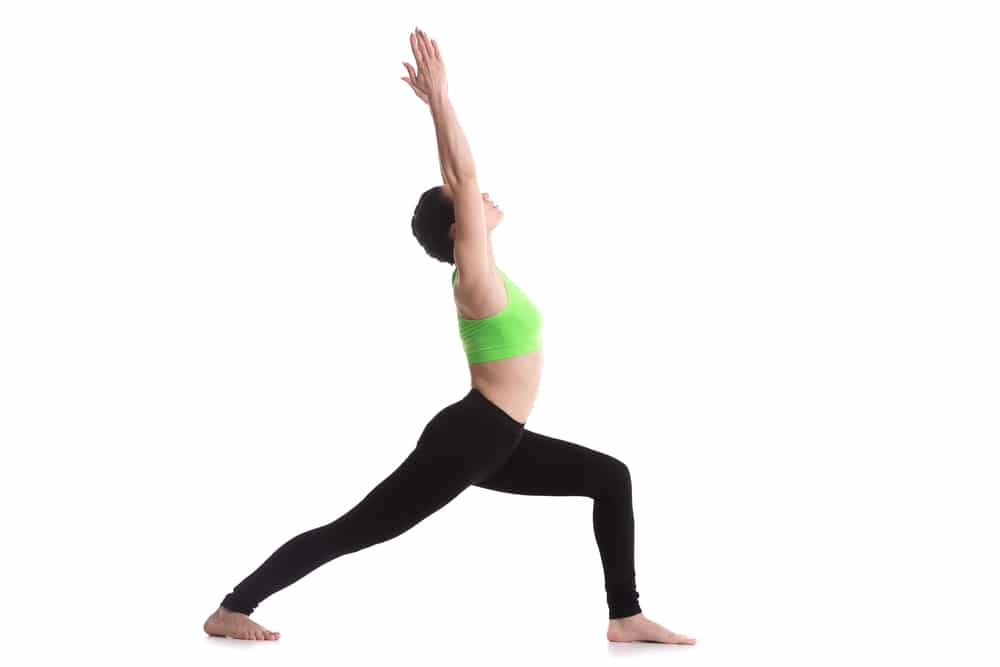 This pose is known to be good for weight loss due to its strength and balance components.
To begin, stand tall with your feet firmly planted on the ground. Move your right foot apart from your left, so that there is about a four-foot gap between your feet.
Pivot your left foot inward so that it is at roughly a 45-degree angle. Move your body so that you are facing the right side.
To further the stretch, begin sinking into your right knee, but make sure your left leg remains straight.
You want to keep your right knee at a 90-degree angle, and your right thigh parallel to the ground. You will feel this pose in your spine, chest, and hips.
Repeat to complete for both sides of your body.
11. Upward (Reverse) Plank Pose
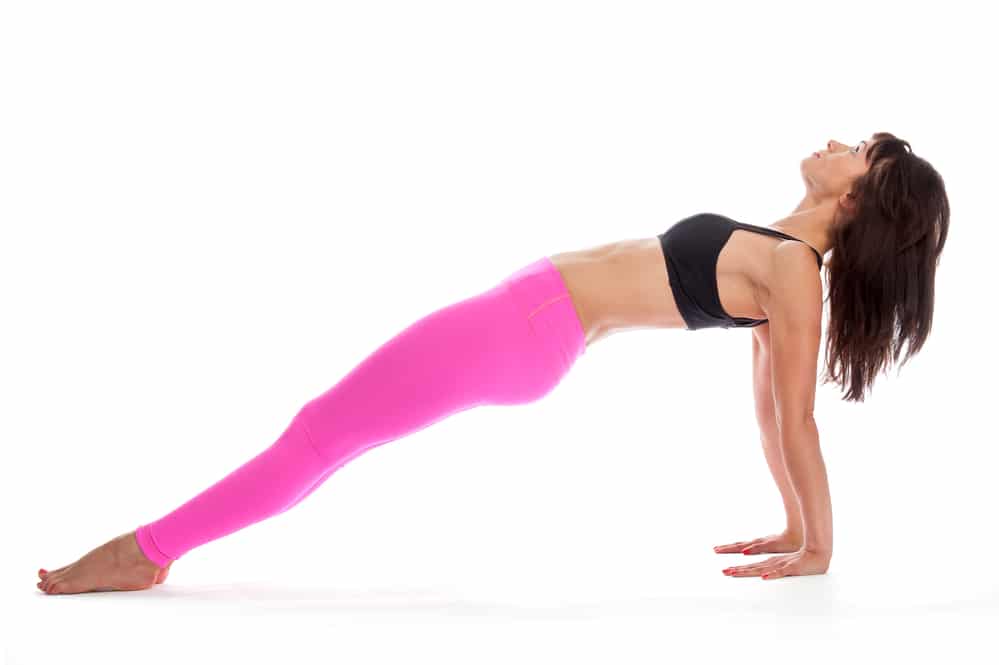 Start this pose by sitting on the floor and stretching your legs out in front of you. Put your hands on the ground slightly behind you so that they align with your shoulders.
This pose will utilize your core and glute strength to lift your body up. As you are holding this pose, make sure that your hips do not rise or fall, but remain straight in line with the rest of your body.
12. Seated Forward Bend Pose
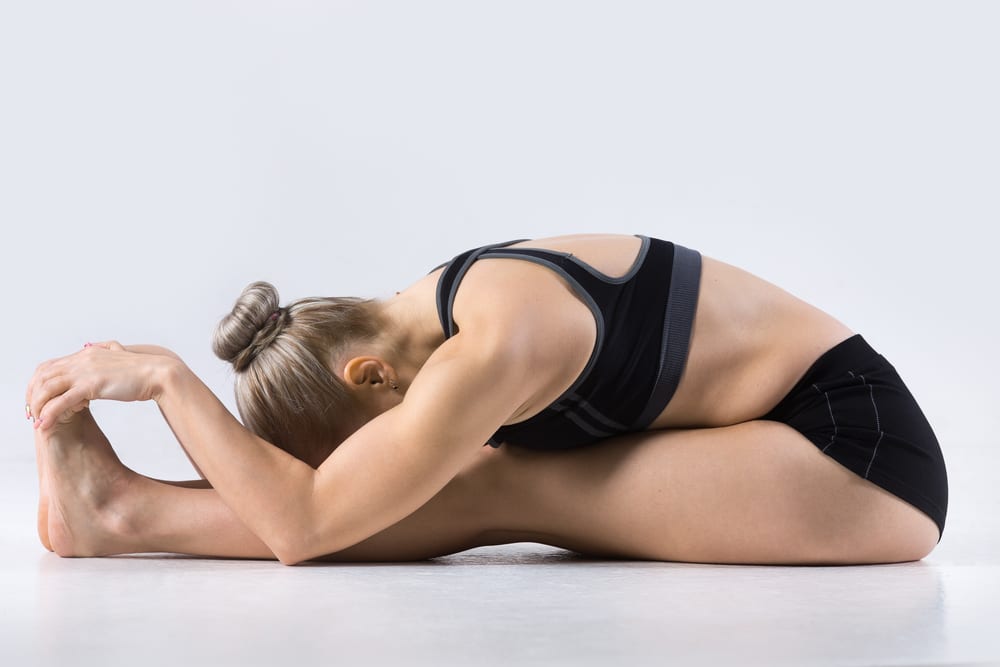 Begin by sitting on the floor or your yoga mat and extend both legs out in front of you.
As you exhale, bend at the hip and extend your hands forward to reach towards your toes. Think about bringing your chest against your legs as you stretch.
Again, do not focus on how far you can reach your arms, but instead focus on the quality of stretch in your upper body.
As a beginner, you may not have the ability to reach your toes due to a lack of flexibility so you can use a strap or towel wrapped around your feet to pull your body closer to your legs.
As a reminder, hold each pose for 30 seconds and complete all the poses in order at least 3 times.
After you’ve gone through a routine entirely, you may rest for 1 minute before continuing to the next set.
If you are able to and would like, you can stay in the pose for longer than 30 seconds. Listen to your body and adjust as needed.
Is yoga good for increasing flexibility?
Research has proven that yoga can increase flexibility by stretching of muscles for a better range of motion. Most other activities or exercises focus on strengthening the muscles or improving cardiovascular health, while yoga’s primary focus is loosening the muscles to increase flexibility. In yoga, you hold certain poses while focusing on breathing, which then relaxes the muscles and allows for a further stretch. According to WebMD, people have noticed a 35 percent increase in flexibility in the first eight weeks of regular yoga practice.
What is the best yoga DVD for flexibility?
A top-rated yoga DVD for flexibility is Gentle Yoga for Balance, Flexibility, and Mobility, Relaxation, Stretching for All Levels by Jessica Smith and is available on Amazon. This DVD is recommended for all levels of yoga practitioners and includes four 20-minute sessions that are easy to follow. In these four sessions, you will find calming yoga poses and sequences that are effective in improving balance, flexibility, and mobility. Being that the DVD is for all levels, you can create your own session using the customizable menu by choosing the exact workout for your needs. You can do one session or flow through all four depending on your schedule or what your personal goals are.The Four Workouts Cover:Flow 1: Neck and Shoulders: This series focus is to release stress and tension within the neck and shoulders. Flow 2: Back and Chest: In this series, poses are designed to open the spine and chest to aid in pain relief and improve posture.Flow 3: Hips and Knees: With a combination of balancing and mobility movements, this series focuses on freeing the hips and unlocking joints throughout the entire leg and helps relieve pain and improve flexibility.Flow 4: Total Body: This portion focuses on the entire body with calming full body poses and stretches.For this program, you will need a yoga mat and a sturdy high back chair. For added comfort with specific poses, you can use pillows or folded blankets and towels.
Is yoga or Pilates better for flexibility?
People often wonder what the difference is between yoga and Pilates, and although they have similar qualities, they are not the same. There is an assumption that Pilates only focuses on strengthening the core, while yoga concentrates only on meditation and breathing, but there is much more within both programs. Many Pilates instructors have an excellent background in meditation practices that they incorporate into their routines as well as many yoga instructors who are skilled in providing top-notch core exercises in their programs.Both Pilates and yoga provide great well-rounded workouts with many experienced teachers, and both have the opportunity to meet your needs. To see what works best for your goals, try classes from both programs. Find different studios and test out the multiple styles they offer to see what works best for you. Yoga has many different styles like Hatha and Vinyasa, that focus on various aspects in their workouts. Pilates has options like using machines or mats and have different intensity levels. Find experienced instructors to ensure proper workouts.Pilates and yoga both focus on breathing, body alignment, balance, strength, and flexibility. They also require the mind to be completely present and the use of the whole body to complete certain exercises and poses. Both are usually done barefoot and offer complete body workouts.Both programs can enhance your strength, balance, and flexibility. Studies have shown that incorporating the two workouts into your exercise routine can benefit your health. The combination of strength exercises and flexibility poses work well together to give you an overall full body workout. As mentioned above, yoga does increase flexibility while Pilates strengthens muscles. Research shows that people who focus on both aspects of strength and flexibility reduce the risk of injury, experience less joint pain, and have an overall healthier lifestyle.
